Tag Archive for: recording studio

Guide: why is no sound unique?

Because it’s a physical phenomenon that can be recorded and analysed.

And, therefore, reproduced.

Almost everything that can be observed and analyzed is reproducible.

Sound is not an abstract concept: it’s a physical phenomenon. We can hear it.

(Here you can find an article that explains what sound is.)

And we can see it too, thanks to spectrometry, sonometry and analyses of stereophonic images.

Sound is nothing but a sum of frequencies with their own phases: we can analyse which frequencies and phases make up a sound, and reproduce them whenever and however we may want to.

We can also create a virtual simulation of an instrument, and make it play.

Which is not so different from what it’s usually done with buildings and airplanes, that get virtually tested long before being built, in order to prevent unnecessary risks.

This kind of technology is called physical modeling.

The only thing that can’t be reproduced at all is creativity.

The ability of each one of us to tell a different story through art.

The ability to create original music.

The sounds that make up music, with some effort, can be reproduced.

No matter which instrument generated them.

But you can’t reproduce creativity.

You need an artist.

For everything else, a computer is enough.

If you want to know the reason behind the realization of these tutorials, you’ll find it here:

Our first post.

Also, on our website you’ll be able to listen to the products of our expertise.

Let us hear from y!

If you have found this post to be useful, share with us your experiences on our socials!
Maybe you could also add a link of what you’ve created, and by using the hashtag #lmkmprod we’ll be able to find all of you.

We’re looking forward to hearing from you!

Guide: which DAW has the best sound?

None.

All audio programs have the same sound quality

Audio software, given that it simply processes sound in a digital way, doesn’t have any physical limit that hardware may face. Like, for example, the usage of worn out or low quality components.

Digital sound processing is nothing but a huge series of fine mathematical calculations. And computers never miscalculate.

The fact that a sound is digitally processed doesn’t ruin its beauty

For each second of a recorded sound, at least 44100 calculations are made.

Which means that a digitally processed sound gets analyzed 44100 times per second.

With the accuracy of a mathematical calculation.

In other words: perfect accuracy.

The only difference in quality will be determined by which audio card we’re going to use

DAWs let us hear the results of their sound elaborations through the audio card.

We’ve created a guide to help you choose the right one: 14 rules to follow when buying an audio card.

If you want to know the reason behind the realization of these tutorials, you’ll find it here:

Our first post.

Also, on our website you’ll be able to listen to the products of our expertise.

Let us hear from y!

If you have found this post to be useful, share with us your experiences on our socials!
Maybe you could also add a link of what you’ve created, and by using the hashtag #lmkmprod we’ll be able to find all of you.

We’re looking forward to hearing from you!

Tutorial: how to create a good reverb

First of all, to create a good reverb, we need to understand what it is composed of:

  • Phase 1: early reflections
  • Phase 2: late reflections

Early reflections are the most complex part of a reverb: they provide us specific information about room size and sound position

Unfortunately, they’re also the hardest thing to set up about a reverb.

As the name suggests, they’re the early reflections caused by reverberation. They’re extremely swift: usually, they happen within 100 milliseconds after the sound is generated.

Due to their swiftness, they’re going to be perceived as part of the sound itself.

Late reflections result from the gradual energy loss of sound waves, reflection after reflection

This part is due to reverberation weakening. They’re called “late reflections” because, unlike early ones, they’re perceived as disconnected from the initial sound.

Depending on the material of the location in which the reverberation occurs, late reflections are going to comprise different frequencies.

Location size influences late reflections duration: the greater its size, the longer the duration will be.

Usually, modern devices are able to create quite realistic late reflections.

Let’s now see how to properly set up a reverberation unit.

For convenience, we’re going to refer to the reverberation space as “room”: reverberation units use the same terminology.

Mind that reverb is one of the most complex features of a sound: make sure that you have a great listening system before starting to edit one.

How to properly set up early reflections

First of all, lower to zero the volume of late reflections.
(Warning: the cheapest reverberation devices don’t allow for this. In such a case, you’ll have to find a work around).

Changing the size of the room: the more you increase early reflections delay (in milliseconds), the bigger the room will seem. Increase or lower the delay until it feels just right.

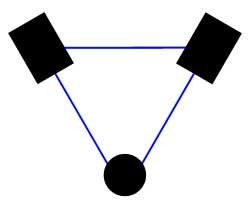
Changing the sound position: in the most sophisticated reverbs, you’ll be able to set up different millisecond values per channel. The more you lower the delay of a channel with respect to another, the more the sound will seem to come from that direction.

Protip: many reverberation devices tend to create early reflections with a very low volume. Do keep this in mind, in the event that you aren’t able to properly hear them.

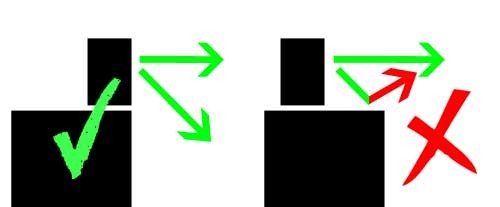
Make sure that your reverb is creating realistic early reflections: unfortunately, many reverberation devices aren’t able to do that.
If you feel like, despite carefully choosing the milliseconds of delay, your reverb doesn’t sound realistic, there’s nothing else to do but change your device.
(Or keep a mediocre one).

How to properly set up late reflections

Leaving early reflections at their normal volume, you have two features you can act upon:
Changing the consistency of room walls: the thicker the wall material, the more they will be able to reflect frequencies.
This feature is usually managed by a low-pass filter (LPF) and a high-pass filter (HPF).
The more you rise the LPF cutoff frequency, the more you will feel like being in a room with metallic walls.
The more you rise the HPF cutoff frequency, the more you will feel like being in a room that absorbs low frequencies (this case is quite peculiar. E.g., a room that’s undergone acoustic treatments).

Changing the size of the room: the longer the late reflection duration, the bigger the room will seem. Increase or lower the duration (in seconds) until it feels just right.

If you want to know the reason behind the realization of these tutorials, you’ll find it here:

Our first post.

Also, on our website you’ll be able to listen to the products of our expertise.

Let us hear from y!

If you have found this post to be useful, share with us your experiences on our socials!
Maybe you could also add a link of what you’ve created, and by using the hashtag #lmkmprod we’ll be able to find all of you.

We’re looking forward to hearing from you!


5 advices to improve your room acoustics

Simple tips to fix the acoustic problems of your room.

In this tutorial we’re going to explain how to fix the most simple acoustic problems a room may have.

How to improve the acoustic quality of your room.

Almost every sound improvement technique moves towards a goal: to eliminate reflections.

Reflections are nothing but altered versions of the initial signal, that are going to mix up the final result, eventually ruining the audio quality.

Standing waves are another major problem, but they are way too complex to explain for a basic tutorial.

  • Don’t let any corner to be empty

    From an acoustic point of view, corners are quite peculiar: if they’re empty, they may cause troubles.

    You should try to cover them, for example using medium density mineral wool panels (do not choose them with density above 100 kg/m3).

  • Don’t have bare walls

    Bare walls create reflections.

    There are many ways you can cover them: fabric, composite mineral wool panels (one panel with density not above 50 kg/m3 along with another underlying panel with density between 70 & 80 kg/m3), foam rubber…

    Your goal is to prevent frequencies to bounce between the walls.

    Keep in mind that, the higher the frequencies, the lower the density of the cover material should be. We will show you in another article how to roughly calculate this ratio.

    Don’t overdo, otherwise you’ll have an excessively dry room. Usually, it is advised to leave at least one wall without any treatment.

  • Don’t have an empty ceiling

    As well as walls, even the ceiling can create reflections.

    Treatment methods are the same as wall ones.

  • Don’t let the room to be empty.

    Couches, armchairs, bookshelves… Anything that fills the room is able to improve its acoustics, dampening the sound waves and preventing them to frantically bounce off the walls, creating reflections.

    As always, don’t overdo, otherwise you’ll have no room to move around.

  • Use scientific methods to analyze the room, so as to understand what the issues are

    Do not rely on your hearing alone: to properly understand which frequencies are causing troubles in your room, you should make use of scientific devices for your measurements.

    For the brave ones, we’ll publish an article in which we’ll explain how to carry out a basic room analysis.


This tutorial is a brief guide aimed at solving some minor sound problems: in case of serious sound issues, the situation becomes extremely difficult, and the treatments required happen to be very expensive and intricate.

In the event that this tutorial is not sufficient to help you achieve a suitable room acoustics, our suggestion is to get in touch with an acoustic treatment specialist.

If you want to know the reason behind the realization of these tutorials, you’ll find it here:

Our first post.

Also, on our website you’ll be able to listen to the products of our expertise.

Let us hear from you!

If you have found this post to be useful, share with us your experiences on our socials!

Maybe you could also add a link of what you’ve created, and by using the hashtag #lmkmprod we’ll be able to find all of you.

We’re looking forward to hearing from you!

Tutorial: 9 steps to place well your studio monitors

10 minutes to properly place your studio monitors.

In this tutorial we’re going to give you 9 simple tips to accurately place your studio monitors.

This is a tutorial for near field monitors.

Premise: you’re going to need a 2 meters long rope/wire, a laser level and a microphone stand.

Any laser level will do the job: you can one for little money in any tool shop.

Like this one, for example.

www.bricoman.it

www.bricoman.it

  • Choose a room with the features listed below.

    The more of these features it has, the better your studio will be

    • Thick walls
    • Walls composed of dense material
    • Uneven walls (for example, natural stone ones)
    • No bare walls (wardrobes, bookshelves, armchairs, couches)
    • No bare corners (corners are, from an acoustic point of view, quite peculiar)
    • Far from bedrooms / highly populated areas
    • Far from noisy public transport systems (underground, tram, train, rocket launch base…)
    • No noisy neighbors
    • Dry
    • Not excessively high or low temperatures
  • Choose and place the workbench

    You should favour a workbench that’s solid and full (that is, without room for legs): they have a better acoustic output.

    Place its rear close to the widest wall, leaving 30-40 cm of empty space between the bench and the wall itself.

  • Place the monitors in line with the workbench edge

    Anything you put below the monitors is going to create reflections. And reflectioins alter the audio signal.

    Try to keep the space in front of the monitors as clear as possible, but there’s no need to overdo: a keyboard, for example, is not going to cause any harm.

    And yes, you got it right: placing the speakers behind a huge mixer with a gazillion of faders is not a good idea.

    Try to put a notebook below your chin while you’re speaking, and listen to the difference. And remember that the human voice has much less frequencies than an audio signal.

    Giusta posizione casse bordo.

    Correct monitor position.

  • Place the monitors so that their tweeters are at the same height as your ears.

    High pitched sounds are extremely directional: to hear them well you need to point them exactly at your ear height.

  • Set up the triangle

    Place the speakers so that they create, more or less, an equilateral triangle with your head as one of the vertexes.

    A rapid method is to use your arms as guides: open them out so as to form an equilateral triangle, having the speakers in front of the palm of your hands.

  • Refining the triangle

    Vertically extend the microphone stand, and place it where your head is going to be.

    Take the wire, measure the distance between the stand and the tweeter and, holding your finger on the rope marking the measured distance, use it to equate the distance between these points:

    • Tweeter 1 – Tweeter 2
    • Tweeter 1 – Stand
    • Tweeter 2 – Stand

    This way, you will obtain a perfect equilateral triangle.

    Like the one in this picture.

    Monitor da studio posizionati correttamente.

    Properly placed studio monitors.

  • Laser pointing.

    Place the laser level upon the monitor, exactly above the tweeter, turn the speaker until the tweeter is aligned with the microphone stand.

    Of course, don’t move around neither the stand nor the monitors: turn the speakers so that their tweeters are pointing towards the stand.

  • Success.

    Pop a bottle of champagne, turn up the volume, and play Lateralus by Tool in your now perfectly positioned system.

At this point, your system is going to be flawlessly positioned.

In other tutorials we will explain how to acoustically prepare the room in which you placed your speakers and how to solve possible sound problems that may ruin the reliability of your audio monitors.

If you want to know why this tutorial was made, you’ll find out more in this post:

Our first post.

And you got our entire website to hear if we’re talking about something that we can do.

We want to hear about you!

If you found this post useful, please: share your experience with us on our social pages!
Maybe together with a link to what you’ve created, and using our official hashtag #lmkmprod to let us find you all.

We’re looking forward to hear about you!