GUIDE: HOW TO MAKE STUDIO QUALITY VOICE RECORDINGS AT HOME
Following this tutorial, you’ll be able to obtain high quality voice recordings with just a few hundred bucks worth of equipment.
These tracks have been recorded following the same method.
Following this tutorial, you’ll be able to obtain high quality voice recordings with just a few hundred bucks worth of equipment.
These tracks have been recorded following the same method.
We advise against using multitrack recorders,as they make the procedure much harder.
If you want to record voices only, Focusrite Scarlett Solo or Steinberg UR12 sound cards are two great choices.
First of all: don’t worry about the brand.
In most cases a better brand does not necessarily indicate a better sound quality,just a better resistance to shock and wear. Both mishaps can easily be avoided with a little care.
To get professional results you can choose between 3 kinds of microphone. Keep in mind that they must be condenser ones..
Here they are in descending order of sound quality.
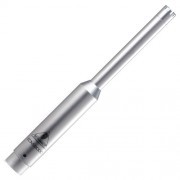
A great example is the Behringer ECM 8000: absolutely affordable and with great sound quality. There’s only one problem: low-cost measurement microphones are quite delicate. Better have a spare one with you.

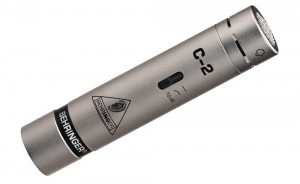
This type of microphone is good too. It is of a lower quality than the aforementioned one, but it gets the job done.

The less desirable kind when speaking of quality, although still suitable for professional purposes.
Since it’s so common, you’re going to save quite some money: it’s almost impossible not knowing someone who owns one.

The most silent you’re able to find:: noisy neighbours or a passing truck can ruin your recording.
There must be close to no reverb (that is jargon for “echo”), to avoid messing up the recording.
Usually, bedrooms (as “unprofessional” as they may sound) are a good fit: beds, couches, chairs, wardrobes, bookshelves… all this furniture helps in reducing reverb.
No specific requirement here. It’s better to use closed headphones or earphones: the chance of sounds passing through and reaching the microphone is greatly reduced.
If you don’t own them already, even something as simple as the Sennheiser HD 201 headphones will do.
In this list you can find the precautions you need to take to have an optimal positioning.
They’re intentionally unordered, since they’re all of the same importance: memorize them or write them down, and you’ll be ready to record.
The microphone will have to be positioned in order not to record the air released by the singer during the performance.
A very simple method to find this position is to have the singer exhale, and move the microphone in a spot where you can’t feel the blown air.
Place it at about 20 cm from the singer’s mouth, always pointing towards it.
This picture illustrates a typical good microphone positioning.

If you want to know the reason behind the realization of these tutorials, you’ll find it here:
Also, on our website you’ll be able to listen to the products of our expertise.
If you have found this post to be useful, share with us your experiences on our socials!
Maybe you could also add a link of what you’ve created, and by using the hashtag #lmkmprod we’ll be able to find all of you.

 Making of: Pagani Zonda R demonstration video
Scroll to top
This site uses cookies. By continuing to browse the site, you are agreeing to our use of cookies.
Learn moreOKWe may request cookies to be set on your device. We use cookies to let us know when you visit our websites, how you interact with us, to enrich your user experience, and to customize your relationship with our website.
Click on the different category headings to find out more. You can also change some of your preferences. Note that blocking some types of cookies may impact your experience on our websites and the services we are able to offer.
These cookies are strictly necessary to provide you with services available through our website and to use some of its features.
Because these cookies are strictly necessary to deliver the website, refusing them will have impact how our site functions. You always can block or delete cookies by changing your browser settings and force blocking all cookies on this website. But this will always prompt you to accept/refuse cookies when revisiting our site.
We fully respect if you want to refuse cookies but to avoid asking you again and again kindly allow us to store a cookie for that. You are free to opt out any time or opt in for other cookies to get a better experience. If you refuse cookies we will remove all set cookies in our domain.
We provide you with a list of stored cookies on your computer in our domain so you can check what we stored. Due to security reasons we are not able to show or modify cookies from other domains. You can check these in your browser security settings.
These cookies collect information that is used either in aggregate form to help us understand how our website is being used or how effective our marketing campaigns are, or to help us customize our website and application for you in order to enhance your experience.
If you do not want that we track your visit to our site you can disable tracking in your browser here:
We also use different external services like Google Webfonts, Google Maps, and external Video providers. Since these providers may collect personal data like your IP address we allow you to block them here. Please be aware that this might heavily reduce the functionality and appearance of our site. Changes will take effect once you reload the page.
Google Webfont Settings:
Google Map Settings:
Google reCaptcha Settings:
Vimeo and Youtube video embeds:
The following cookies are also needed - You can choose if you want to allow them:
